How To A Screenshot On Dell Laptop? Best Tips
Quick And Easy Ways To Screenshot On Your Dell Laptop

Taking a Screenshot On Dell Laptop is a simple process that can be done in a few different ways. Whether you need to capture an image of your desktop, a specific application window, or a portion of your screen, there are several methods you can use to take a screenshot on your Dell laptop.
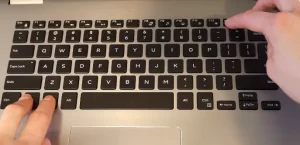
The most common way to take a screenshot on a Dell laptop is by using the Print Screen key. This key is typically located in the top row of your keyboard and may be labelled as “PrtScn” or “PrtScr.” Once you press this key, a screenshot of your entire screen will be saved to your clipboard, which you can then paste into an image editing program or another application.
If you need to take a screenshot of a specific window, you can use the Alt + Print Screen key combination. This will capture a screenshot of the active window and save it to your clipboard. Alternatively, you can use the built-in Snipping Tool or Snip & Sketch applications to take more advanced screenshots, such as capturing a specific area of your screen or annotating your screenshots with text and other elements.

Credit: Youtube
Key Takeaways
- Taking a screenshot on a Dell laptop is a simple process that can be done using the Print Screen key or other built-in applications.
- If you need to take a screenshot of a specific window, use the Alt + Print Screen key combination.
- For more advanced screenshot options, use the Snipping Tool or Snip & Sketch applications.
Understanding Your Dell Laptop
Before learning how to take a screenshot on your Dell laptop, it’s important to understand the basic layout of your device. Dell laptops come in various models and sizes, but most of them have similar features. Here’s a quick overview of the different parts of a Dell laptop:

Credit: Amazon
Keyboard
The keyboard is one of the most important components of a Dell laptop. It allows you to type in text, numbers, and special characters. Dell keyboards typically have a QWERTY layout, which is the standard keyboard layout used in most English-speaking countries. Some Dell laptops also have a numeric keypad on the right side of the keyboard for easy number input.
Touchpad
The touchpad is a rectangular area located below the keyboard on most Dell laptops. It functions as a mouse and allows you to move the cursor on the screen. You can left-click, right-click, and scroll using the touchpad. Some Dell laptops also have a touch screen, which allows you to interact with the device using your fingers.
Display
The display is the screen of your Dell laptop. It shows you all the information and images generated by the device. Dell laptops come in various screen sizes, ranging from 11 inches to 17 inches. The resolution of the display determines the clarity of the images and text on the screen. Higher resolutions offer sharper and clearer visuals.
Ports
Dell laptops have various ports that allow you to connect external devices. The most common ports are USB, HDMI, and Ethernet. USB ports are used for connecting peripherals such as a mouse, keyboard, or external hard drive. HDMI ports allow you to connect your laptop to an external display such as a TV or projector. Ethernet ports are used for wired internet connections.
Battery
The battery is what powers your Dell laptop. It allows you to use the device without being plugged into an electrical outlet. The battery life of a Dell laptop varies depending on the model and usage. Some models have longer battery life than others.
Knowing the different parts of your Dell laptop will make it easier for you to navigate and use the device. Now that you have a basic understanding of your laptop, you’re ready to learn how to take a screenshot on it.
Locating The Screenshot Key
Taking a screenshot on a Dell laptop is a useful feature that can help you capture an image of your screen. To take a screenshot on a Dell laptop, you need to locate the screenshot key on your keyboard. This section will guide you on how to identify the screenshot key on your Dell laptop.
Identifying The PrtScn Key
The Print Screen (PrtScn) key is the primary key used to take a screenshot on a Dell laptop. The key is usually located at the top-right corner of the keyboard, next to the Function keys. If you cannot locate the PrtScn key, take a look at the Function keys, and you might find the key there. It’s usually on the F10 key.
Using The Fn Key
Some Dell laptops require the use of the Fn key to access the PrtScn key. To take a screenshot on a Dell laptop that requires the use of the Fn key, press and hold the Fn key, then press the PrtScn key. This action will capture the entire screen and save it to the clipboard. You can then paste the screenshot into an image editor or document.
In conclusion, identifying the PrtScn key is the first step in taking a screenshot on a Dell laptop. If you cannot locate the PrtScn key, check the Function keys. Some Dell laptops may require the use of the Fn key to access the PrtScn key.
Taking A Basic Screenshot

Taking a screenshot on a Dell laptop is a simple and straightforward process. There are several ways to take a screenshot on a Dell laptop, including using keyboard shortcuts, the Snipping Tool, or third-party software. Here’s how to take a basic screenshot on a Dell laptop using keyboard shortcuts:
- Locate the screen or content you want to capture on your Dell laptop.
- Press the Print Screen (PrtScn) key on your keyboard. This key is usually located in the top-right corner of the keyboard, next to the Function keys. If you’re using a Dell laptop without a Print Screen key, you can use the Fn + Insert keys instead.
- Open an image editor or word processing program, such as Microsoft Paint or Word.
- Paste the screenshot into the program by pressing Ctrl + V or right-clicking and selecting Paste.
- Save the screenshot as an image file, such as JPEG or PNG.
It’s important to note that taking a screenshot using the Print Screen key captures the entire screen, including any open windows or applications. If you only want to capture a specific portion of the screen, you can use the Snipping Tool or third-party software.
Overall, taking a basic screenshot on a Dell laptop is a quick and easy process that can be done using keyboard shortcuts.
Taking A Screenshot Of An Active Window
Saving Your Screenshot
After taking a screenshot on your Dell laptop, you may want to save it for future use. Here are a few ways to save your screenshot:
Using the Clipboard
When you take a screenshot on your Dell laptop, it is automatically saved to your clipboard. To save the screenshot, you need to paste it into an image editor such as Microsoft Paint or Photoshop. Once you have pasted the screenshot, you can edit it and save it in your desired format.
Using the “Screenshots” Folder
If you have taken a screenshot using the “Win + Prt Scn” shortcut, the screenshot will be automatically saved in the “Screenshots” folder within your Pictures library. You can access this folder by going to File Explorer > Pictures > Screenshots. From here, you can open, edit, and save your screenshot.
Using Third-Party Screenshot Tools
If you are looking for more advanced screenshot features, you can use third-party screenshot tools such as Snagit or Greenshot. These tools offer a variety of editing and saving options, including the ability to save your screenshot as a PDF, Word document, or HTML file.
It is important to note that when saving your screenshot, you should choose a file format that is compatible with the program or platform you will be using it on. For example, if you are sharing the screenshot on social media, you may want to save it as a JPEG or PNG file. If you are using the screenshot in a document, you may want to save it as a PDF.
Overall, saving your screenshot on your Dell laptop is a simple process that can be done using the clipboard, the “Screenshots” folder, or third-party screenshot tools. By choosing the right file format and editing your screenshot as needed, you can ensure that it is ready for use in any context.
Using Snipping Tool
Snipping Tool is a built-in screenshot tool in Windows that enables users to capture a screenshot of any object on their screen and then annotate, save, or share the image. Here’s how to use Snipping Tool on a Dell laptop.
Opening The Snipping Tool
To open Snipping Tool, click the Start button in the lower-left corner of the screen, type “snipping tool” in the search box, and then click the Snipping Tool app in the list of results. Alternatively, you can press the Windows key + Shift + S to open the Snipping Tool in a special mode that lets you take a screenshot of a specific area of the screen.
Selecting A Snip Type
After opening the Snipping Tool, you will see a small window with a “New” button. Click the button to start the snipping process. You can then select the type of snip you want to take from the drop-down menu. The options include:
- Free-form Snip: Draw a free-form shape around the object you want to capture.
- Rectangular Snip: Draw a rectangle around the object you want to capture.
- Window Snip: Capture the entire window of a program.
- Full-screen Snip: Capture the entire screen.
Once you have selected the type of snip you want to take, click and drag your mouse to draw a rectangle around the area you want to capture. When you release the mouse button, the screenshot will be taken.
Saving The Snip
After taking the screenshot, you can use the Snipping Tool’s editing tools to annotate the image, highlight important areas, or add text. You can also save the screenshot to your computer by clicking the “Save” button in the Snipping Tool window. By default, the screenshot will be saved as a PNG file in the “Pictures” folder. You can also copy the screenshot to the clipboard by clicking the “Copy” button, and then paste it into an image editor or other application.
That’s how to use the Snipping Tool on a Dell laptop to take a screenshot. It’s a quick and easy way to capture images of anything on your screen.
Using Snip & Sketch
Snip & Sketch is a built-in Windows tool that allows users to take screenshots and edit them. Here are the steps to use Snip & Sketch on a Dell laptop.
Accessing Snip & Sketch
To open Snip & Sketch, click the Start button, scroll down the Apps list, and select the Snip & Sketch shortcut. Alternatively, you can access Snip & Sketch more quickly by clicking the Action Center icon and selecting the Snip & Sketch button.
Creating A New Snip
Once you have opened Snip & Sketch, you can take a screenshot by clicking the New button. You will be given four options for taking a screenshot:
- Freeform Snip: This option allows you to draw a free-form shape around the area of the screen you want to capture.
- Rectangular Snip: This option allows you to draw a rectangle around the area of the screen you want to capture.
- Window Snip: This option allows you to select a specific window to capture.
- Fullscreen Snip: This option captures the entire screen image.
After selecting the type of snip you want to take, click and drag your cursor over the area you want to capture. Once you release your cursor, the screenshot will be saved to your clipboard and a preview of the screenshot will appear in the Snip & Sketch window.
Saving The Snip
After taking a screenshot, you can edit it by clicking the Edit button in the Snip & Sketch window. This will open the editing tools, which allow you to crop, draw, highlight, and add text to the screenshot. Once you have finished editing the screenshot, you can save it by clicking the Save button. You will be prompted to choose a file name and location for the screenshot.
Overall, Snip & Sketch is a useful tool for taking and editing screenshots on a Dell laptop. By following these simple steps, users can easily capture and save screenshots for later use.
Troubleshooting Common Issues
While taking screenshots on a Dell laptop is a straightforward process, sometimes users may face issues that prevent them from capturing the desired screen. Here are some common issues that users may encounter and how to troubleshoot them:
Print Screen Not Working
If the Print Screen key is not working, there are several things that users can try to fix the issue. One option is to use the Win + PrtSc key combination, which saves the screenshot as an image file to the Pictures > Screenshots folder. Alternatively, users can try disconnecting and reconnecting the keyboard or restarting the laptop.
Screenshot Not Capturing Desired Screen
Sometimes, users may find that the screenshot they took did not capture the desired screen. This can happen if the user accidentally clicked on the wrong window or if the screen changed while they were taking the screenshot. In this case, users can try taking another screenshot or using the Alt + PrtScr key combination to capture only the active window.
Screenshot Quality Issues
Users may also encounter issues with the quality of their screenshots, such as blurriness or distortion. This can happen if the screen resolution is set too low or if the graphics card drivers are outdated. To fix this issue, users can try adjusting the screen resolution or updating their graphics card drivers.
Screenshot Software Not Working
If users are using third-party screenshot software and it is not working, there are several things they can try. First, they can check if the software is up-to-date and if there are any known issues with the version they are using. They can also try uninstalling and reinstalling the software or using a different software altogether.
By following these troubleshooting tips, users can resolve common issues and take high-quality screenshots on their Dell laptop.

FAQs Of How To A Screenshot On Dell Laptop?
What are the different ways to take a screenshot on a Dell laptop?
There are several ways to take a screenshot on a Dell laptop. One of the easiest ways is to press the PrintScreen (PrtScn) key on your keyboard. This captures a screenshot of your entire screen and saves it to your clipboard. You can then paste it into an image editor like Paint and save it as an image file. Another way to take a screenshot is to use the Windows Snipping Tool. This tool allows you to capture a specific area of your screen and save it as an image file.
How do I take a screenshot on a Dell laptop without a PrintScreen button?
If your Dell laptop does not have a PrintScreen button, you can use the Windows Snipping Tool to take a screenshot. To open the Snipping Tool, click on the Start menu, type “Snipping Tool” in the search bar, and click on the app when it appears. Once the Snipping Tool is open, select the type of snip you want to make, and then click and drag the cursor over the area you want to capture.
Where can I find my screenshots on my Dell laptop?
By default, screenshots taken on a Dell laptop are saved to the Pictures folder in a subfolder called Screenshots. You can access this folder by opening File Explorer and navigating to Pictures > Screenshots.
What are the screenshot keys on a Dell laptop?
The screenshot key on a Dell laptop is the PrintScreen (PrtScn) key. This key captures a screenshot of your entire screen and saves it to your clipboard.
How do I view my screenshots on my Dell computer?
To view your screenshots on a Dell computer, open the File Explorer and navigate to the Pictures folder. From there, open the Screenshots folder to view your screenshots.
What are some Windows screenshot options for Dell laptops?
In addition to the PrintScreen key and the Snipping Tool, Windows also offers other screenshot options for Dell laptops. You can use the Windows Game Bar to take screenshots while playing games, or you can use the Windows + Shift + S keyboard shortcut to open the Snip & Sketch tool, which allows you to capture a specific area of your screen and save it as an image file.
Conclusion
In conclusion, taking a screenshot on a Dell laptop is a simple and straightforward process. Users can choose to use the Print Screen key to capture the entire screen or use third-party software for more advanced options.
It is important to note that the method of taking a screenshot may vary depending on the model of the Dell laptop and the operating system being used. Users should refer to the user manual or Dell’s support website for specific instructions.
Overall, knowing how to take a screenshot can be a useful skill for both personal and professional use. Whether it’s capturing an error message for technical support or saving an image for reference, taking a screenshot on a Dell laptop can save time and make tasks easier.
By following the steps outlined in this article and using the resources provided, users can confidently take screenshots on their Dell laptops with ease.

I am a technology Specialized writer and blogger based in the USA & UK. I have four years of experience in Cyber Security, Technology, Social Media and all types of electronic devices like computer laptops etc. So I work on solving these issues and give various tips on these issues


