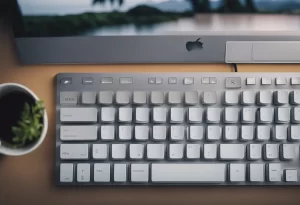
How To Add Apple Keyboard To Windows? Apple keyboards are known for their sleek design and user-friendly features. However, if you are a Windows user, you might think that you cannot use an Apple keyboard with your PC. The good news is that it is possible to add an Apple keyboard to your Windows computer, and it is not as complicated as you might think.
Understanding the compatibility between Apple keyboards and Windows is the first step to successfully adding an Apple keyboard to your PC. While Apple keyboards are designed to work with Mac computers, they can also be used with Windows computers. However, some keys on the keyboard may not work the same way as they do on a Mac, and you may need to customize some settings to get the keyboard to work properly.
To add an Apple keyboard to your Windows computer, you will need to follow some preparation steps and installation processes. These steps include turning on the keyboard, putting it in pairing mode, and connecting it to your computer via Bluetooth. Troubleshooting common issues, such as connectivity problems and missing keys, may also be necessary. With these steps, you can easily add an Apple keyboard to your Windows computer and enjoy its user-friendly features.
Key Takeaways
- Apple keyboards can be used with Windows computers with some customization.
- Preparation steps and installation processes are necessary to add an Apple keyboard to a Windows computer.
- Troubleshooting common issues may be required to ensure proper connectivity and functionality.
Understanding How To Add Apple Keyboard To Windows

When it comes to using an Apple keyboard with a Windows PC, there are some compatibility issues that users must be aware of. In this section, we will discuss the compatibility between Apple keyboards and Windows operating systems.
Apple Keyboard and Windows Compatibility
Apple keyboards can work with Windows PCs, but some keys may not function as expected. For instance, the Command key on an Apple keyboard acts as the Windows key, and the placement of the Alt key differs, which can be confusing for users switching between systems. To use an Apple keyboard with Windows, users must install the appropriate drivers from the Apple website or third-party sources. While functional, users should be aware of these compatibility issues and limitations.
Preparation Steps

Before adding an Apple keyboard to Windows, there are a few preparation steps that need to be taken. These steps include checking system requirements and acquiring necessary tools.
Checking System Requirements
To ensure that the Apple keyboard can be added to a Windows system, it is important to check the system requirements. The system requirements for adding an Apple keyboard to Windows are as follows:
- Windows 10 or later
- Bluetooth connectivity
If the system does not meet these requirements, it may not be possible to add the Apple keyboard to Windows. It is important to note that some older Apple keyboards may not be compatible with Windows.
Acquiring Necessary Tools
To add an Apple keyboard to Windows, it is necessary to have the following tools:
- Apple keyboard
- Windows PC with Bluetooth connectivity
It is important to ensure that the Apple keyboard is fully charged or has fresh batteries before attempting to connect it to a Windows PC. If the keyboard is not charged or does not have fresh batteries, it may not be possible to connect it to the PC.
Once the system requirements have been checked and the necessary tools have been acquired, it is possible to proceed with adding the Apple keyboard to Windows.
Installation Process
To add an Apple keyboard to a Windows computer, users need to follow a few steps. This section will guide readers through the installation process.
Downloading Required Software
The first step is to download the required software. Users need to download the latest version of the Apple Boot Camp software from the official Apple website. This software will enable Windows to recognize the Apple keyboard.
Installing the Software
After downloading the software, users need to install it on their Windows computer. To do this, double-click on the downloaded file and follow the on-screen instructions. Users may need to restart their computer after the installation process is complete.

Credit: Amazon
Adding the Apple Keyboard
Once the software is installed, users can add their Apple keyboard to their Windows computer. Follow these steps to add the keyboard:
- Turn on the Apple keyboard by pressing the power button.
- On the Windows computer, go to Start Menu > Settings > Devices > Bluetooth & other devices.
- Click on “Add Bluetooth or other device.”
- Select “Bluetooth.”
- Wait for the computer to detect the Apple keyboard.
- Click on the Apple keyboard when it appears on the list of available devices.
- Follow the on-screen instructions to complete the pairing process.
After following these steps, the Apple keyboard should be successfully paired with the Windows computer. Users can now use the Apple keyboard to type on their Windows computer.
It is important to note that some keys on the Apple keyboard may not work as expected on a Windows computer. Users may need to use the on-screen keyboard or remap keys to get the desired functionality.
Troubleshooting Common Issues
If you are experiencing issues with your Apple keyboard not connecting or functioning properly on your Windows computer, there are a few common issues that you may encounter. Here are some troubleshooting steps that you can take to resolve these issues.
Keyboard Not Detected
If your Windows computer is not detecting your Apple keyboard, there are a few things that you can try:
- Make sure that your keyboard is turned on and in pairing mode. You can do this by holding down the power button on your keyboard until the LED light starts flashing.
- Check that your computer’s Bluetooth is turned on and in discoverable mode. You can do this by going to your computer’s Bluetooth settings and making sure that it is set to “discoverable”.
- Try resetting your keyboard’s connection by turning it off and then back on again. You can also try resetting your computer’s Bluetooth connection by turning it off and then back on again.
If none of these steps work, you may need to try pairing your keyboard with a different device to see if the issue is with your keyboard or your computer’s Bluetooth connection.
Function Keys Not Working
If your Apple keyboard’s function keys are not working on your Windows computer, there are a few things that you can try:
- Make sure that your keyboard’s function keys are set to work with Windows. You can do this by going to your computer’s keyboard settings and selecting “Use all F1, F2, etc. keys as standard function keys”.
- Try using the On-Screen Keyboard to access your function keys. This can be done by going to your computer’s Start menu and searching for “On-Screen Keyboard”.
- If you are using a wireless keyboard, make sure that it is fully charged or has fresh batteries. Low battery levels can cause some keys to stop working.
If none of these steps work, you may need to try resetting your keyboard’s connection or contacting Apple support for further assistance.
Conclusion
In conclusion, adding an Apple keyboard to a Windows computer is a simple process that can be done in a few steps. First, make sure that the keyboard is charged or has fresh batteries. Then, turn on Bluetooth on your Windows computer and put the keyboard into pairing mode. Once the keyboard is detected, follow the on-screen instructions to complete the pairing process.
It’s important to note that some Apple keyboards may require additional software to work properly on a Windows computer. In these cases, users should download and install the necessary software from the Apple website or through the Windows Device Manager.
Overall, using an Apple keyboard on a Windows computer can provide a comfortable and familiar typing experience for those who prefer the Apple keyboard layout. With the simple steps outlined in this article, users can easily add an Apple keyboard to their Windows computer and start typing away.
Frequently Asked Questions
How can I connect my Apple Magic Keyboard to Windows 11?
To connect your Apple Magic Keyboard to Windows 11, you need to turn on Bluetooth on your Windows 11 PC and put your keyboard in pairing mode. Follow these steps:
- Turn on your Apple Magic Keyboard.
- Press and hold the power button until the green LED light starts flashing.
- Open the Settings app on your Windows 11 PC.
- Click on “Bluetooth & devices” in the left sidebar.
- Click on “Add device” at the top.
- Select your Apple Magic Keyboard from the list of available devices.
- Follow the on-screen instructions to complete the pairing process.
What should I do if my Apple wireless keyboard won’t connect to Windows?
If your Apple wireless keyboard won’t connect to Windows, try the following steps:
- Make sure the keyboard is turned on and has fresh batteries or is charged.
- Turn off Bluetooth on your Windows PC, wait a few seconds, and then turn it back on.
- Try restarting your Windows PC.
- Reset your Apple wireless keyboard by pressing and holding the power button for 5 seconds until the green LED light blinks.
- Try re-pairing your Apple wireless keyboard with your Windows PC.
How do I make my Apple keyboard discoverable on Windows?
To make your Apple keyboard discoverable on Windows, you need to put it in pairing mode. Follow these steps:
- Turn on your Apple keyboard.
- Press and hold the power button until the green LED light starts flashing.
- Open the Settings app on your Windows PC.
- Click on “Bluetooth & devices” in the left sidebar.
- Click on “Add device” at the top.
- Select your Apple keyboard from the list of available devices.
- Follow the on-screen instructions to complete the pairing process.
Why is my Apple keyboard not working on Windows?
If your Apple keyboard is not working on Windows, try the following steps:
- Make sure the keyboard is turned on and has fresh batteries or is charged.
- Try restarting your Windows PC.
- Check if your keyboard is paired with your Windows PC.
- Try resetting your keyboard by pressing and holding the power button for 5 seconds until the green LED light blinks.
- Try re-pairing your keyboard with your Windows PC.
How do I change my Apple keyboard to Windows mapping?
To change your Apple keyboard to Windows mapping, you can use the Microsoft PowerToys app. Follow these steps:
- Download and install the Microsoft PowerToys app on your Windows PC.
- Open the app and click on “Keyboard Manager” in the left sidebar.
- Click on “Remap a key” and select the key you want to remap.
- Choose the key you want to map it to and click “OK”.
- Repeat the process for other keys you want to remap.
Is it possible to use a Mac-style keyboard for PC?
Yes, it is possible to use a Mac-style keyboard for PC. All Mac and Apple keyboards also work on the PC. You can connect your Mac-style keyboard to your PC via Bluetooth or USB. Follow the steps mentioned above to pair your keyboard with your PC.

I am a technology Specialized writer and blogger based in the USA & UK. I have four years of experience in Cyber Security, Technology, Social Media and all types of electronic devices like computer laptops etc. So I work on solving these issues and give various tips on these issues


